You want your car to stand out, right? I get it. A unique ride is a personal statement. poze cu stici might be what you’re searching for—visual inspiration and practical advice on car stickers.
This guide is all about that. It’s packed with ideas and tips to help you choose, apply, and maintain the perfect decals. You’ll leave here not just inspired but also confident in your ability to transform your vehicle.
The right sticker can completely change a car’s personality, from subtle accents to bold statements. Let’s dive in.
More Than Just Stickers: Understanding Decal Types for Your Vehicle
When it comes to customizing your ride, the world of automotive stickers can be a bit overwhelming. There are so many types and terms, it’s easy to get lost.
Let’s start with die-cut vinyl decals. These are cut from a solid sheet of vinyl, which means no background or extra material. They’re durable and perfect for custom lettering and logos.
Printed vinyl stickers and wraps, on the other hand, are great for complex, full-color images and large-scale graphics. They’re printed on a vinyl sheet and then applied to the vehicle.
Transfer stickers are a bit different. The design is moved from a backing paper to the surface, making them ideal for intricate designs. This method ensures that even the most detailed artwork looks sharp and clean.
Bumper stickers and window clings are also popular. Bumper stickers are usually made of a thin, flexible material with a strong adhesive. Window clings, as the name suggests, cling to the glass without any adhesive, making them easy to remove and reposition.
So, which type is best for different parts of your car? For windows, go with window clings or printed vinyl. For body panels, die-cut or printed vinyl works well.
And for bumpers, bumper stickers are a classic choice.
Understanding these options (poze cu stici) can help you make the right choice for your vehicle.
Inspiration Gallery: Popular Car Sticker Ideas and Styles
When it comes to customizing your ride, car stickers can make a big difference. They’re a simple way to add personality and style without breaking the bank.
Let’s dive into some popular styles and ideas that can transform your vehicle.
JDM (Japanese Domestic Market) Style
JDM stickers are all about that iconic, street-smart look. Think of designs like the ‘Shocker’ or brand logos such as Spoon Sports. These stickers often find their home on side windows or bumpers, giving your car an authentic, edgy vibe.
(Include image placeholder)
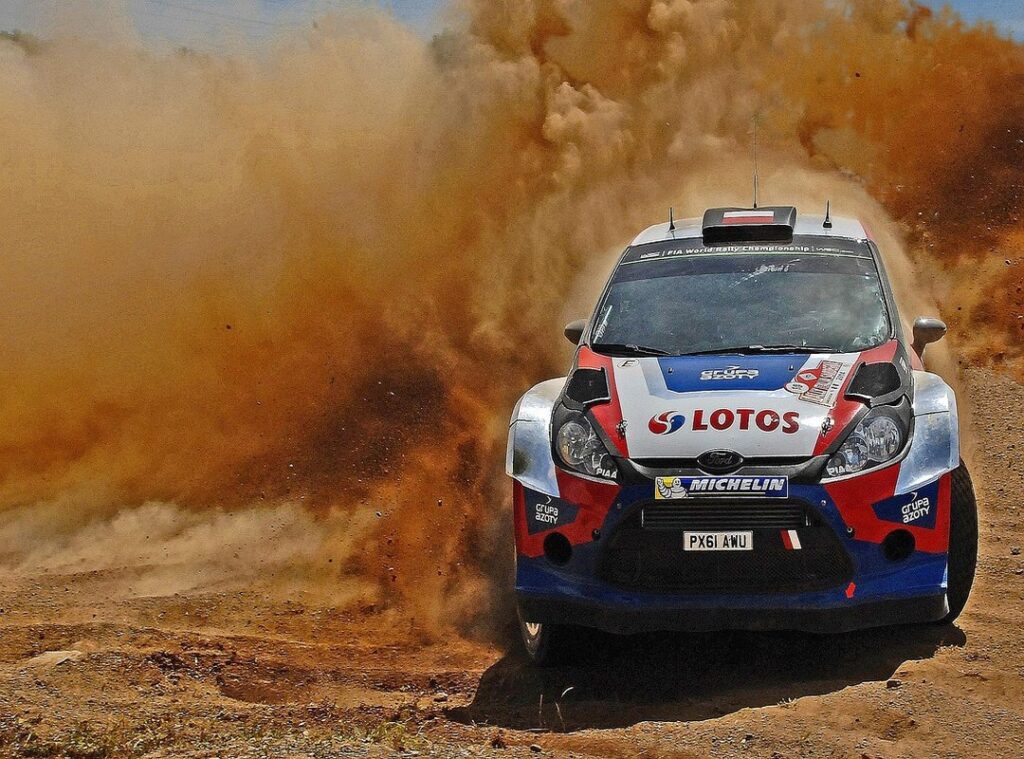
Racing and Motorsport Look
Racing stripes, sponsor logos, and number decals can give your car a track-ready aesthetic. This style is perfect for those who love the thrill of speed and want to show it off. Placing these stickers on the hood or along the sides can make your car look like it’s ready to hit the track.
(Include image placeholder)
Funny and Pop-Culture References
Witty bumper stickers or decals from popular movies, games, and memes are a great way to show off your personality. Whether it’s a clever one-liner or a reference to your favorite character, these stickers can make people smile and spark conversations. (Include image placeholder)
Minimalist and Subtle Approach
For those who prefer a more understated look, minimalist stickers are the way to go. Small, tasteful logos, pinstripes, or geometric shapes can enhance a car’s lines without being too loud. These subtle touches can be placed on the quarter window or rear windshield for a clean, elegant effect.
(Include image placeholder)
Placement Strategies
The location of a sticker can really affect the overall look. For example, placing a large, bold sticker on the rear windshield might be too distracting, while a small, subtle design on the quarter window can add a touch of class. Think about where you want the focus to be and how the sticker will complement your car’s design.
Poze cu stici can help you visualize different placements and styles before you commit. It’s a great way to experiment and find the perfect look for your ride. Fmbmotoracing
Get it Right the First Time: How to Apply Car Decals Like a Pro

I remember the first time I tried to apply a decal on my car. It was a disaster. Bubbles everywhere, and it just wouldn’t stick right.
I learned the hard way that proper preparation and technique are key.
Step 1: Surface Preparation
Start by cleaning the area where you’ll place the decal. Use isopropyl alcohol and a microfiber cloth to remove any wax, dirt, or oils. This step is crucial.
A clean surface ensures the decal adheres properly.
Step 2: Positioning
Once the surface is clean, position the decal. Use masking tape to create a ‘hinge’ at the top. This allows you to lift and reposition the decal until it’s exactly where you want it.
Trust me, this little trick makes all the difference.
Step 3: Application
Now, use a squeegee or even a credit card to press the decal onto the surface. Work from the center outwards, and this helps push out any air bubbles.
Take your time here. Rushing can lead to more bubbles and a less professional look.
Step 4: Removing the Transfer Tape
Finally, peel the transfer tape back slowly at a sharp angle. Make sure the vinyl stays on the surface. If you notice any part of the decal lifting, press it down again with the squeegee.
- Pro-Tip: For larger decals, try the wet application method. Spray a mixture of water and a few drops of dish soap (poze cu stici) onto the surface before applying the decal. This allows for easier repositioning and helps prevent bubbles.
Applying decals can be a bit tricky, but with these steps, you’ll get a bubble-free, long-lasting finish. And hey, if it doesn’t go perfectly the first time, don’t sweat it. Practice makes perfect.
Avoiding Sticker Shock: Common Mistakes and Care Tips
Applying decals in direct sunlight or extreme cold is a big no-no. The temperature can cause the adhesive to fail, leading to peeling and bubbling.
Another common mistake is not cleaning the surface properly. Dirt and grime can prevent the decal from adhering correctly.
Rushing the process is also a mistake. Take your time to ensure the decal is smooth and bubble-free.
After application, avoid using high-pressure car washes directly on sticker edges. This can lift the edges and cause water to seep underneath, leading to damage.
To care for your decals, wash them gently with soap and water. Avoid harsh chemicals and abrasive sponges.
When it’s time to remove old decals, use a heat gun or hair dryer to soften the adhesive. Then, carefully scrape off the decal with a plastic razor blade.
Poze cu stici can be a real pain, but with the right tools and techniques, you can avoid damaging your car’s paint.
Buying high-quality vinyl is crucial. Cheap vinyl can fade, crack, and even damage your car’s paint over time. Invest in good quality to save yourself headaches down the road.
Ready to Personalize Your Vehicle?
You now know the different types of decals, have poze cu stici for visual inspiration, and understand the professional application process. Personalizing a vehicle with stickers is an accessible and fun way to express individuality.
Choose a style you liked from the inspiration section and take the next step. Start planning your first (or next) decal project with confidence. With the right knowledge, you can avoid common pitfalls and achieve a look you’ll be proud of.
 Lirona Vaxhaven contributes informative content to FMB Motor Racing with a focus on motorcycle mechanics, maintenance advice, and rider-focused vehicle care. Dedicated to making technical topics easier to understand, she creates accessible guides that help enthusiasts improve their knowledge of bike performance and long-term maintenance.